HBI3260-2C integrated servo teardown
In this post, we'll take a look inside the HBI 3260-2C integrated servo that I bought for pennies some time ago.
The first thing I usually do before disassembling the device is conduct a brief
research to find any related documentation. I discovered that this servo was part of the
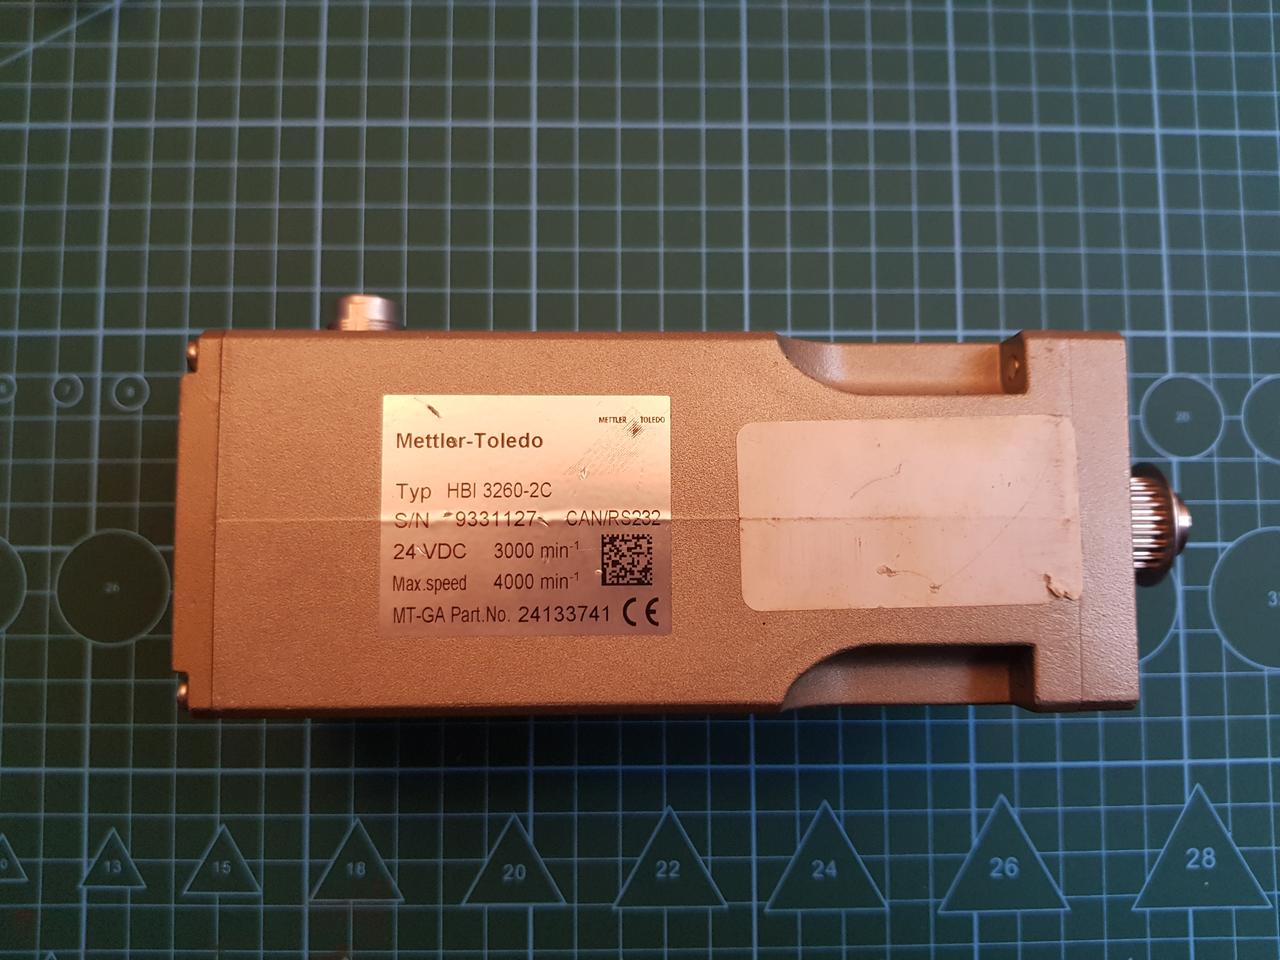
Mettler Toledo XS3
checkweigher machine
(part number - MT-GA Prt. No. 24133741).
Despite the device being labeled Mettler-Toledo, the manufacturer is ENGEL Elektroantriebe. Upon examining Engle products, I found a similar device with the same markings, but a different connector. The Manual in PDF can be found here. I see two explanations for this: either the part I have is some kind of old design, or it's a device specially manufactured for Mettler-Toledo with potentially limited functionality.
Now, let's see what's inside.
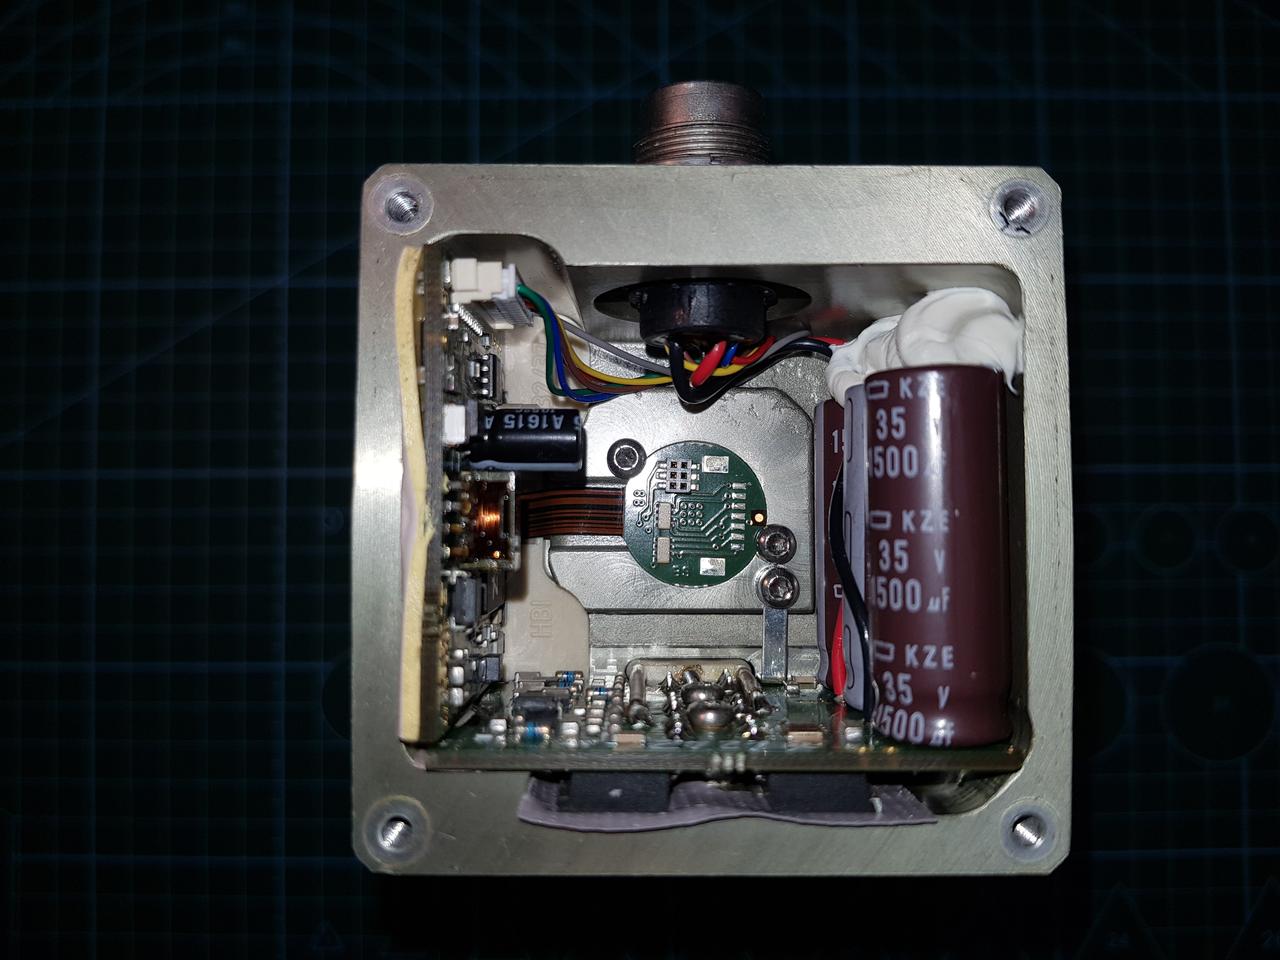
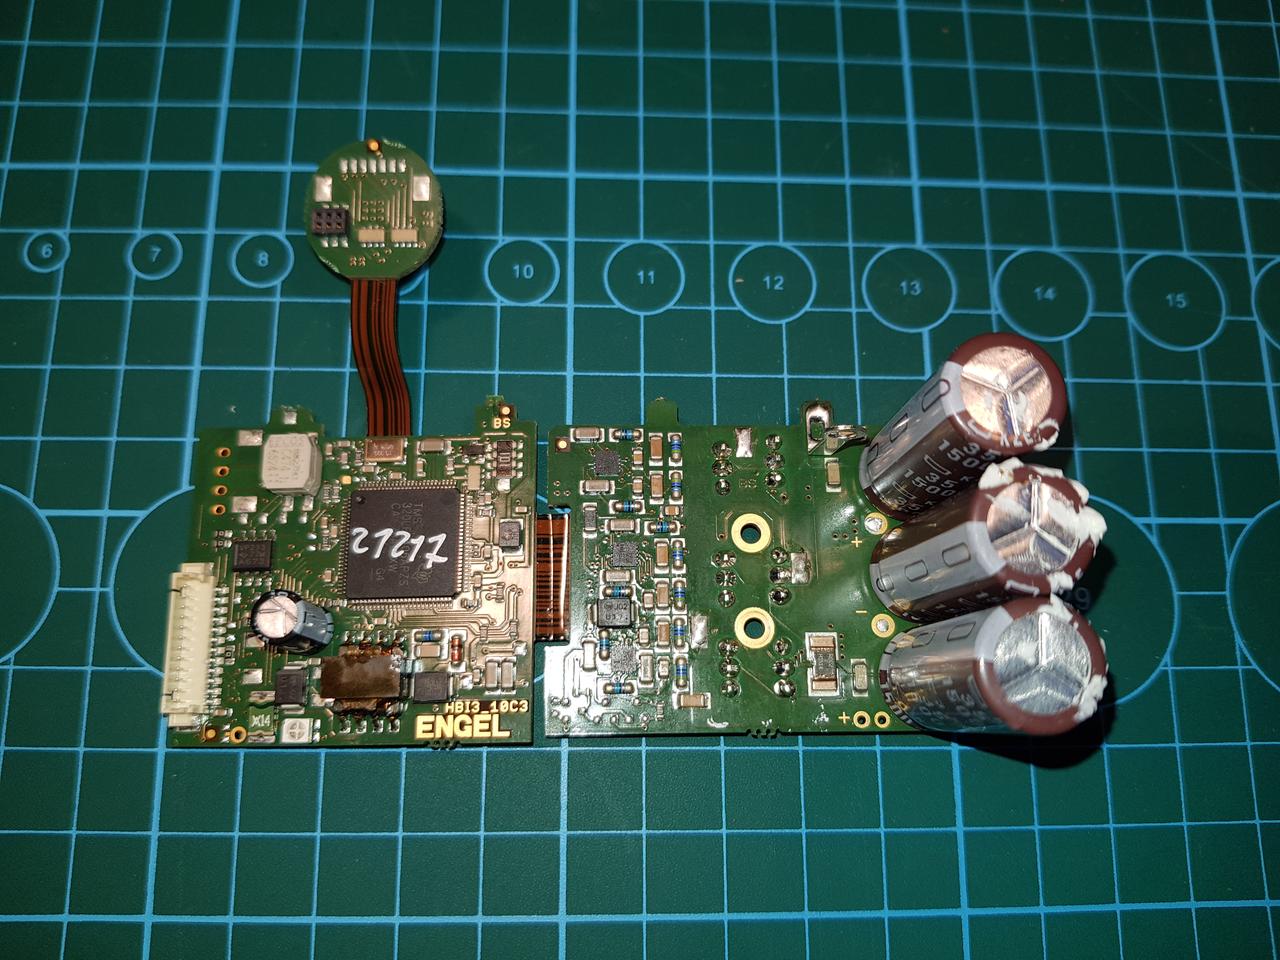
We can observe neatly arranged electronics based on rigid-flex PCB design, featuring high quality electrolytic capacitors from Nippon Chemi-Con glued to the enclosure to prevent vibration. The power transistors on the bottom board are covered with some kind of thermal conductive material. In the center, there's a board with most likely a magnetic encoder.
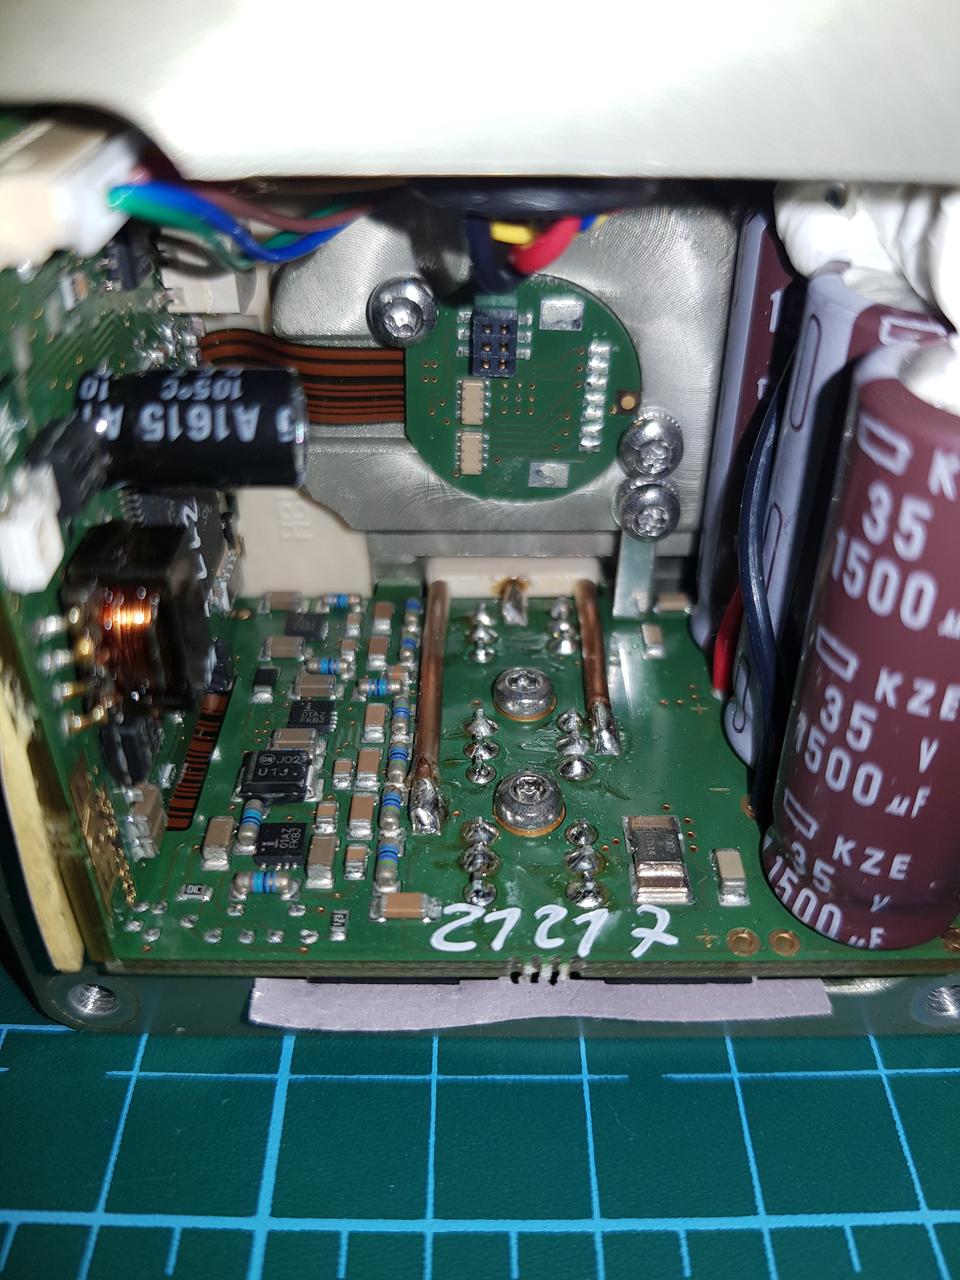
Motor connectors are soldered directly to the PCB. In the middle of the PCB, there are screws pressing down the power transistors, securing the entire PCB in place. The first shunt resistor for measuring motor phase currents is visible in the lower right corner. On the left, there are half-bridge drivers from Intersil - ISL2101.
Take a closer look at the MCU.
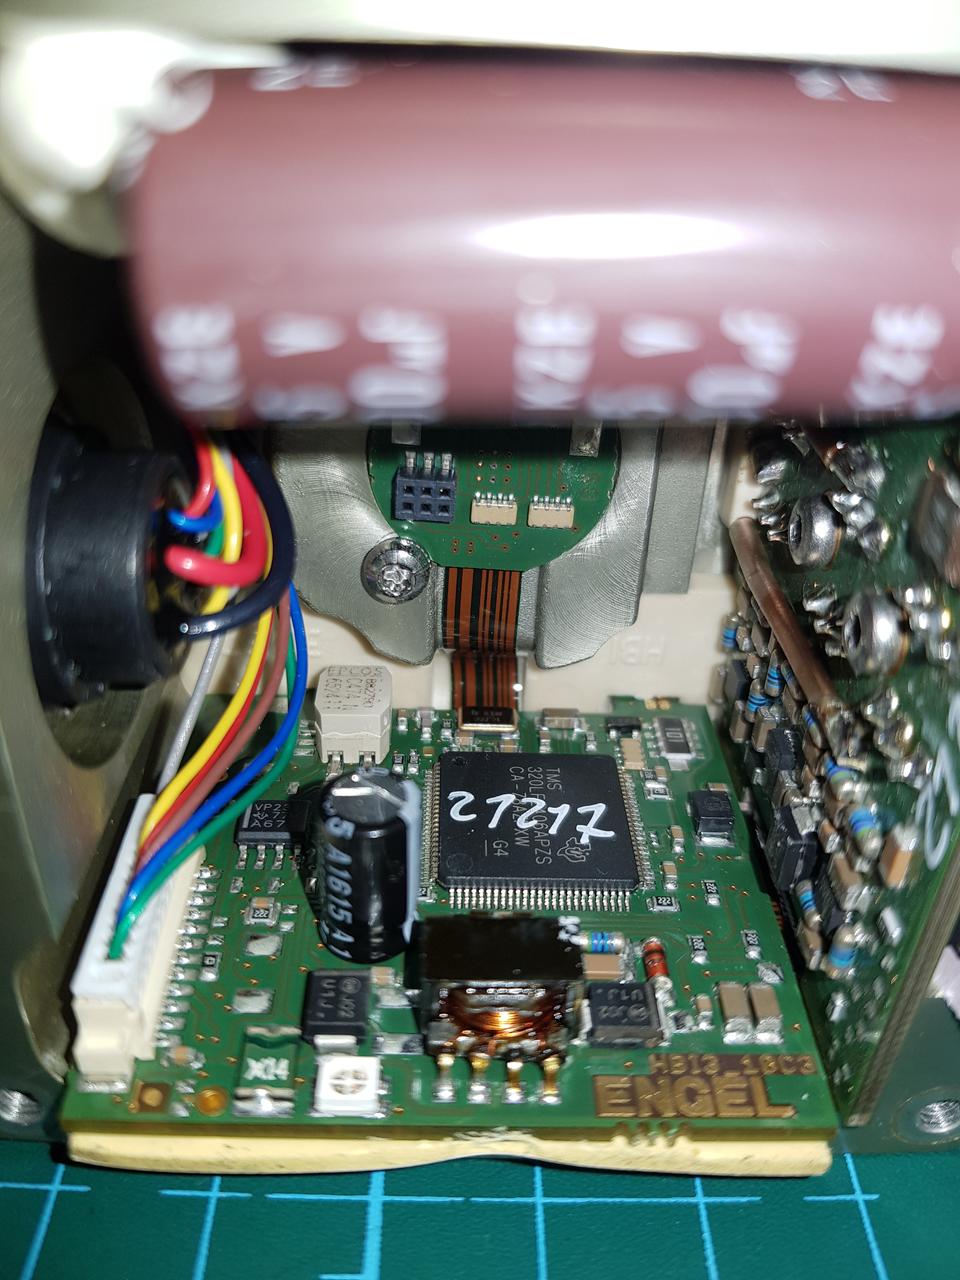
It's an old-school DSP from TI - TMS320LF2406A. In the top left corner of the DSP we can observe the EPCOS common-mode choke for CAN network.
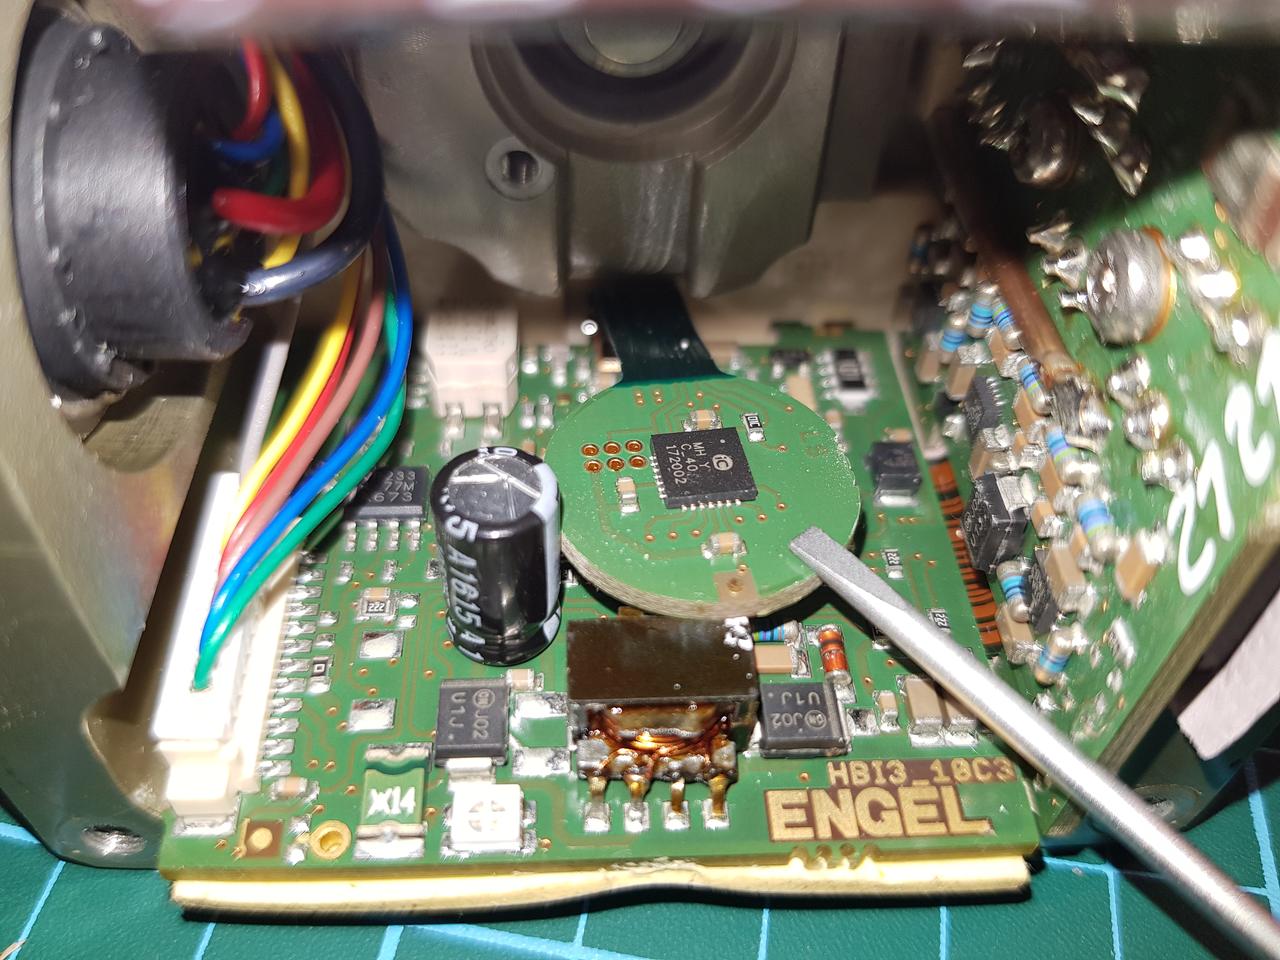
Here, we have a magnetic encoder from IMM Photonic - IC-MH (PDF)
After a quick analysis of the electronics inside, I managed to find the M12 connector pinout necessary to start the motor:
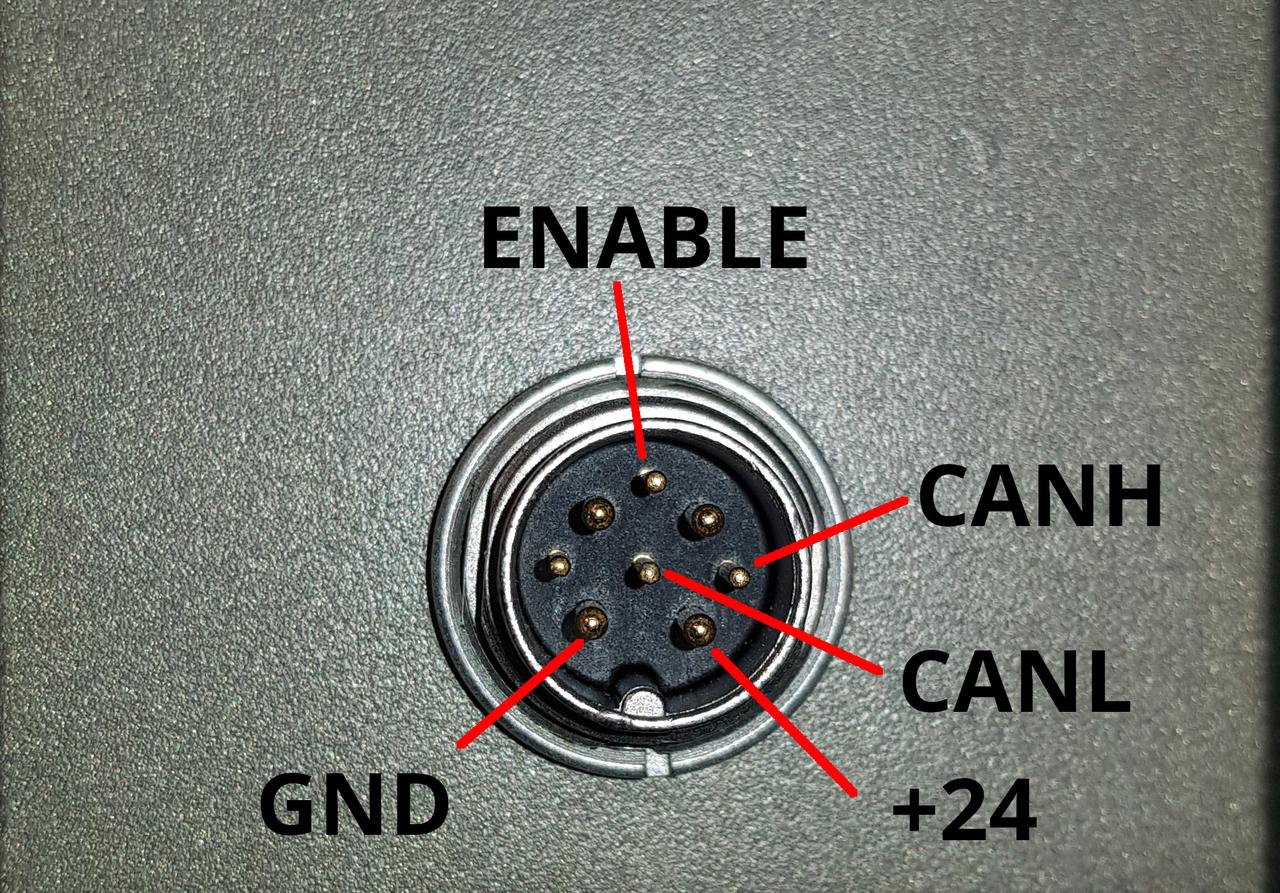
I connected the power supply, set the ENABLE pin high (+24V) and the
motor started spinning. Unfortunately, there was no traffic on the CAN bus.
This, I conclude that OpenCAN interface was permanently disabled, and the servo is
configured in constant speed mode (according to the manual I found, it's possible).
I don't have access to Engel DSerV configuration software, so there's
nothing more I can do here. A bit of a bummer, as OpenCAN support was the main
reason I bought this motor in the first place :)
In this case, we can proceed with the teardown...
After some gymnastics with desoldering motor wires and unscrewing Torx screws, we can see the entire PCB design.
Now, we can finally see the other side of the board:
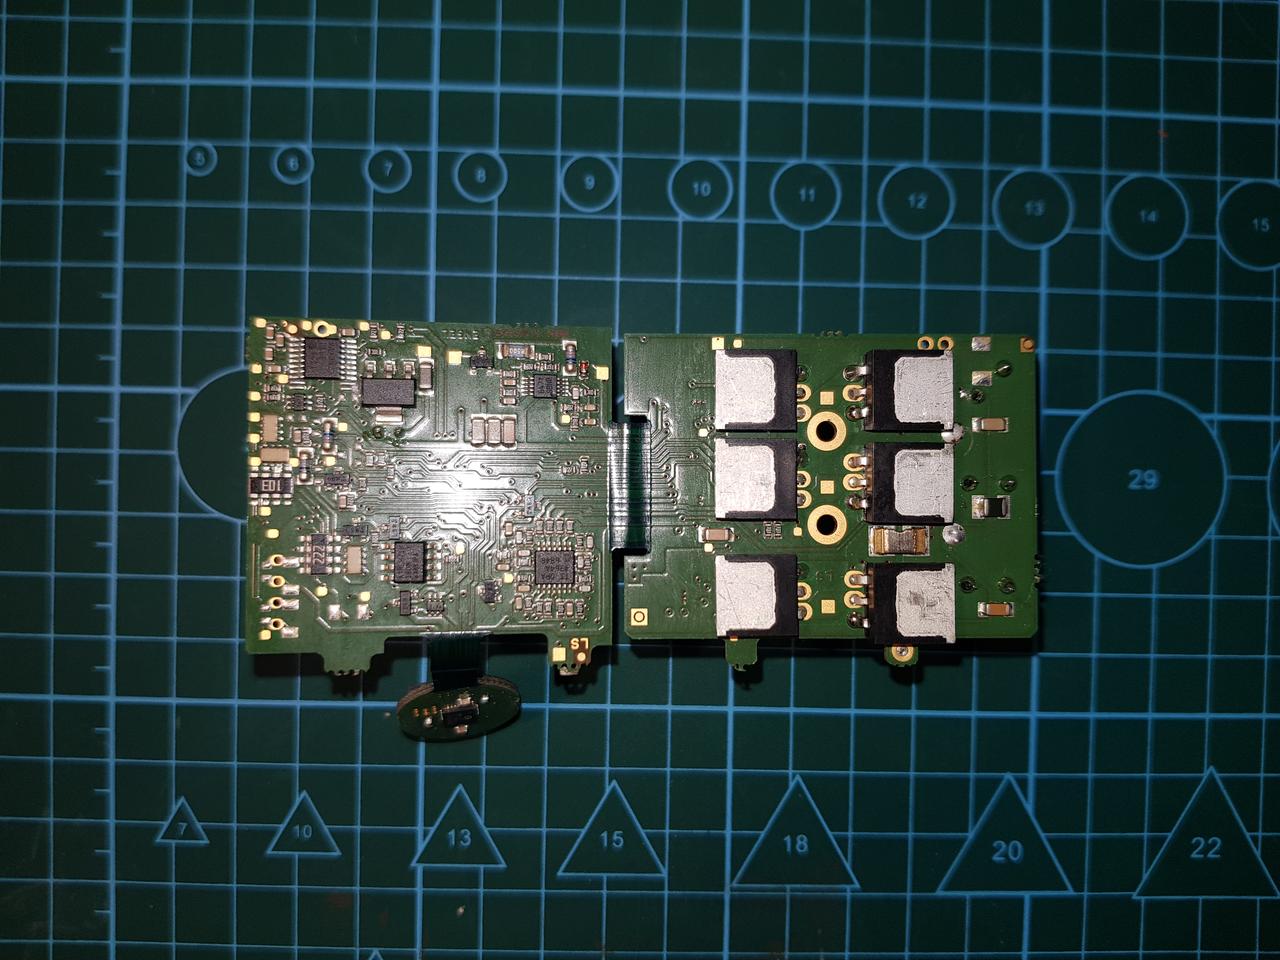
Interesting chips here:
RS232 transceiver - MAX3323
CAN transceiver (marked as VP233) - SN65HVD233
Current sense opamp - OPA4364
Serial EEPROM - AT24C16D
We can spot the second shunt resistor, so this inverter is in two-shunt low-side current sensing topology.
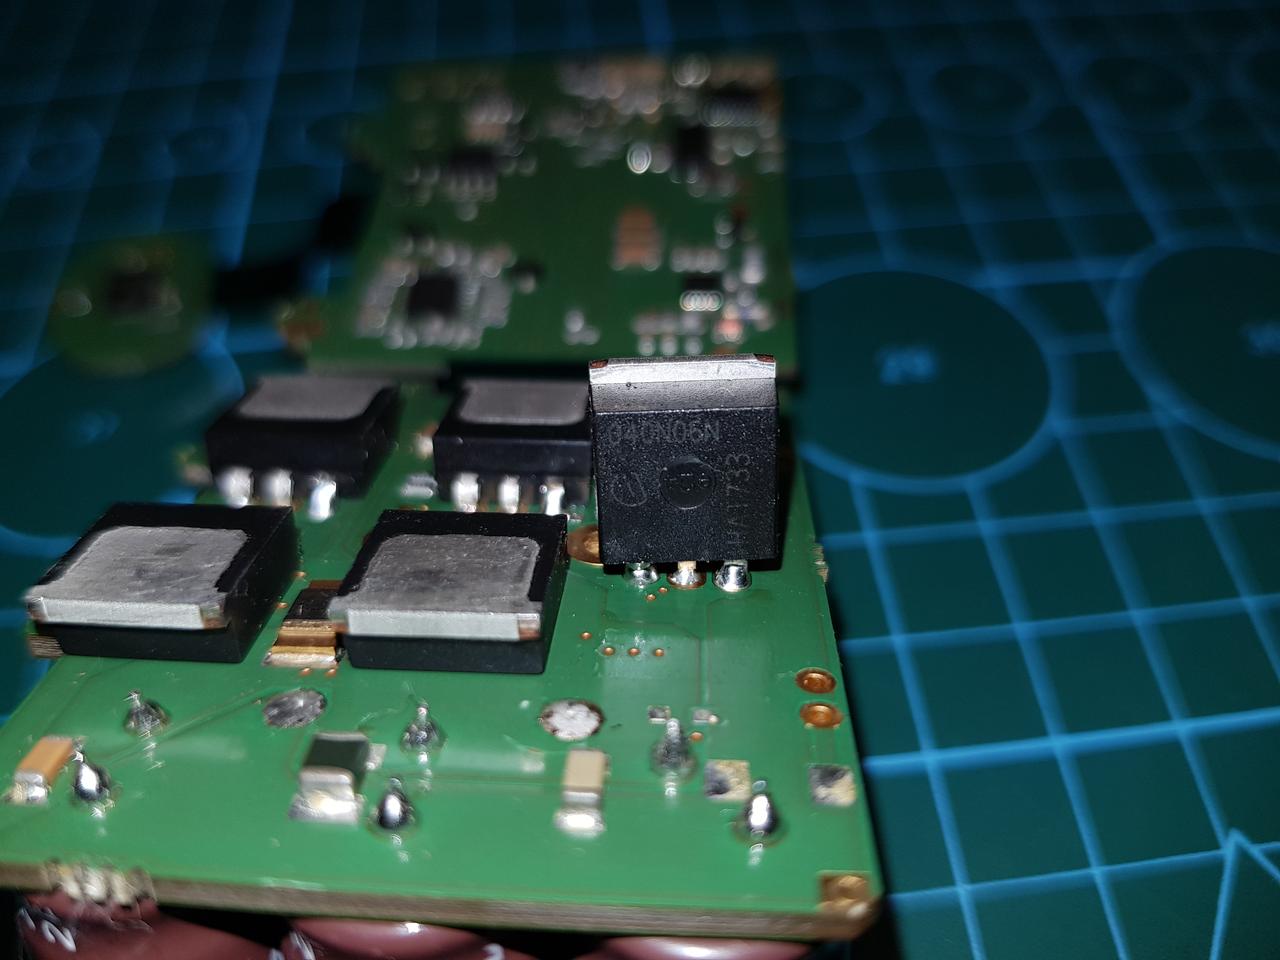
Power transistors from Infineon: IPA040N06N.
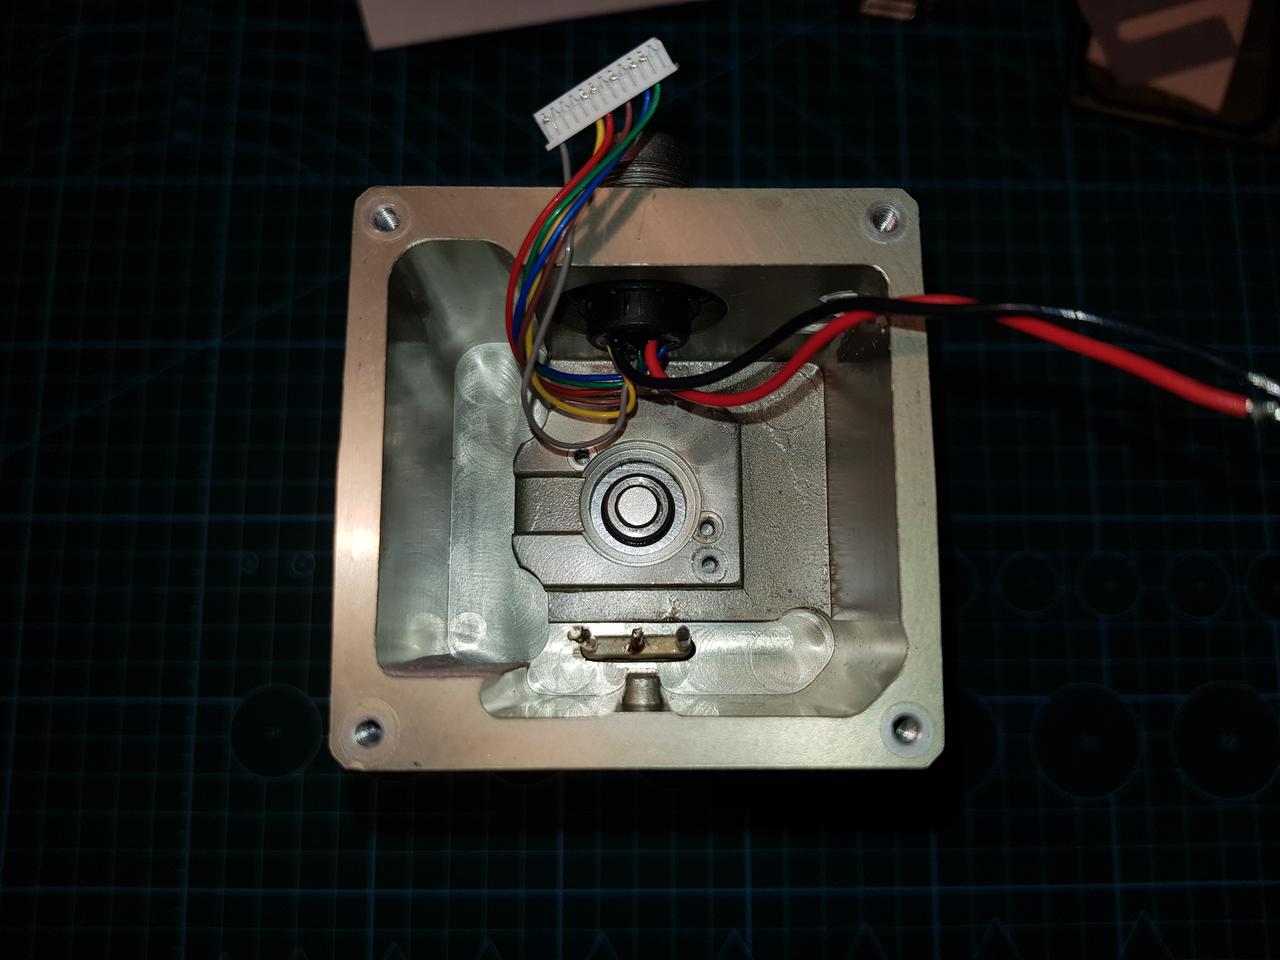
There's nothing interesting left in the servo housing.
In the future, I'll try to run the motor with a NuttX-based controller.
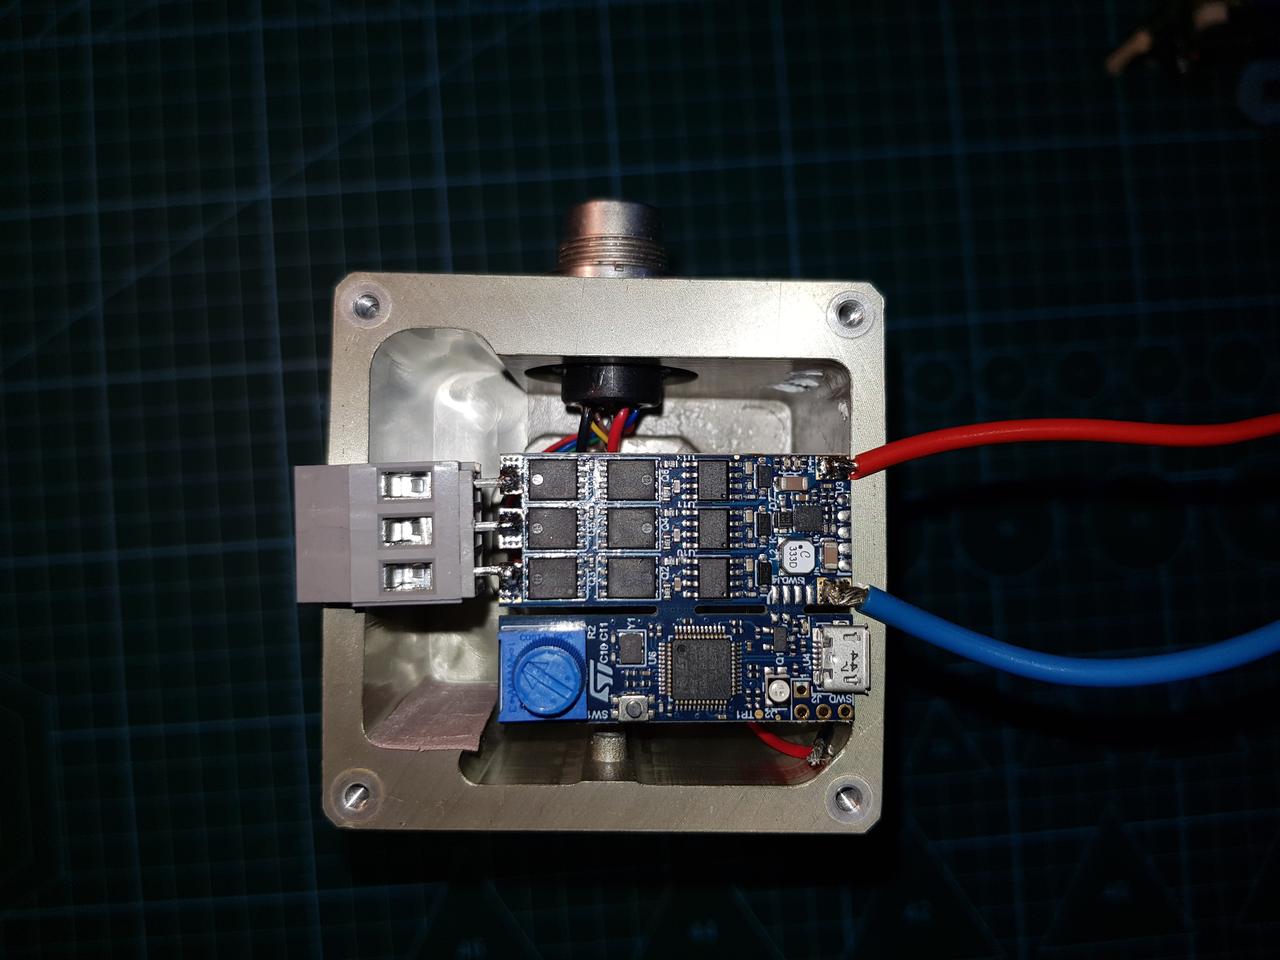
B-G431B-ESC1 fits quite well here, don't you think?
Comments